ImageKit.io Example
Image Kit CDN is a global, secure, and reliable CDN provider mainly used for all the content delivering websites as well as for those who want to improve their website performance. This section covers a step-by-step guide to configuring Imagekit.io with our CDN plugin in your nopCommerce store.
STEPS TO CONFIGURE TAWK.TO
- After you have installed and enabled the CDN plugin in your nopCommerce website, please see the steps below to continue to configure imagekit.io to enable CDN on your website.
- If you don't already have an account with imagekit.io then you can create a free account on imagekit.io by clicking on this link.
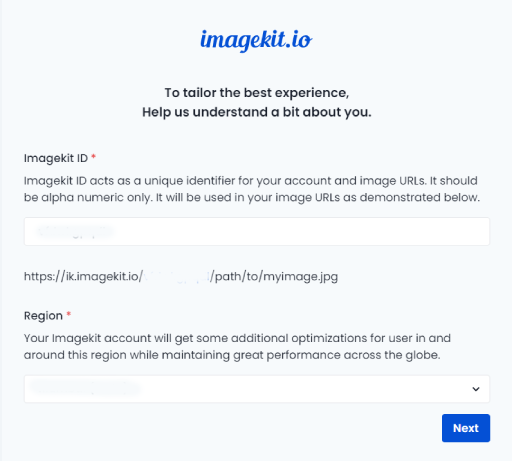
- While creating your Imagekit account you will get an imagekit ID as shown in the image below. You can also customize the URL as per your requirement.
- Once your account is created you can now go to the External storage section from the menu. Click on add new for creating your website folder in the image kit as shown in the image below.
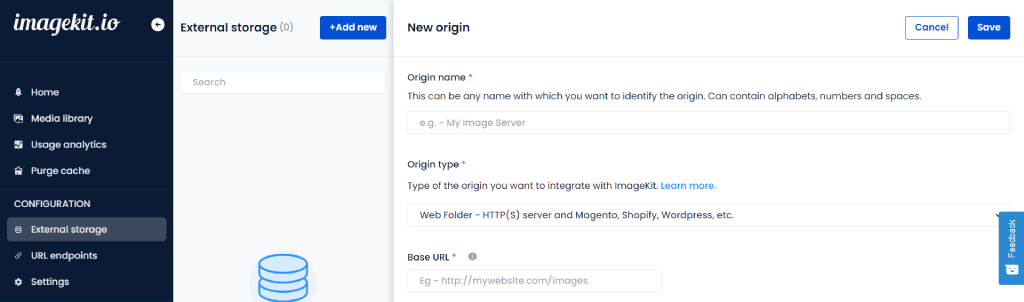
- Save the folder in External storage.
- Then the next step is to add the URL endpoint in the image kit. You can find the URL endpoint below External Storage in the menu section.
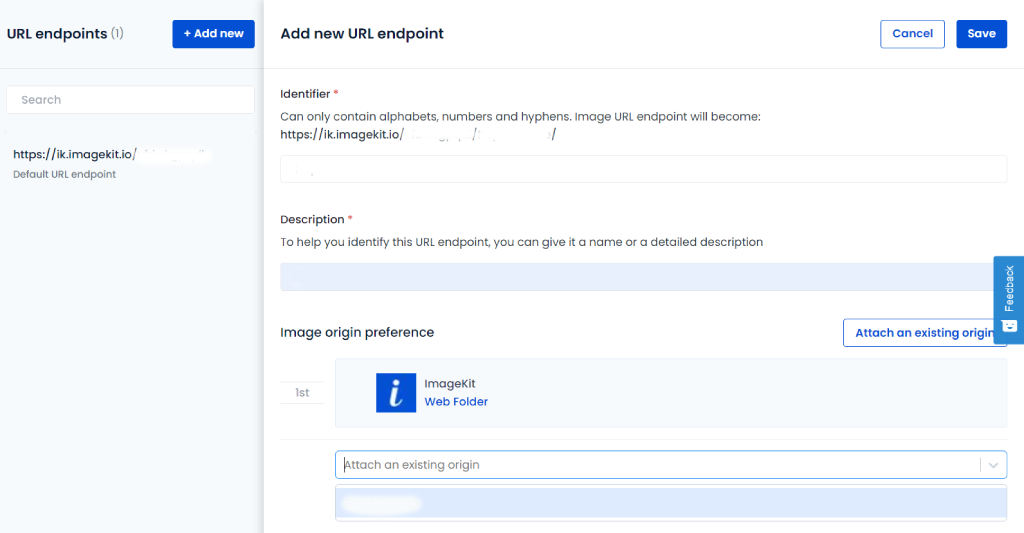
- Click on URL endpoints and then click on Add new. Add the details of your website as shown in the image below.
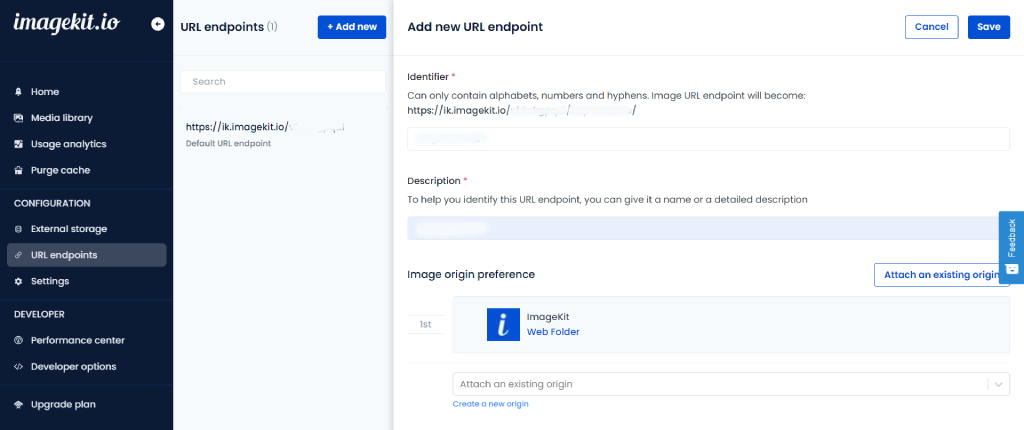
- In the Image Origin Preference section, select your site for the list as shown in the image below, and then click Save.
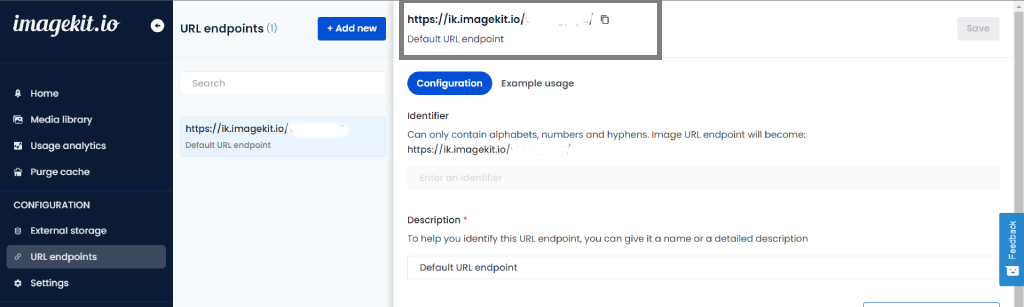
- If you miss copying the CDN URL at the login section. You can copy the link for the URL endpoints as shown in the image below.
- Once you have copied the Imagekit URL, you can now paste it into the Image URL, CSS URL, and JavaScript URL. As shown in the image below.
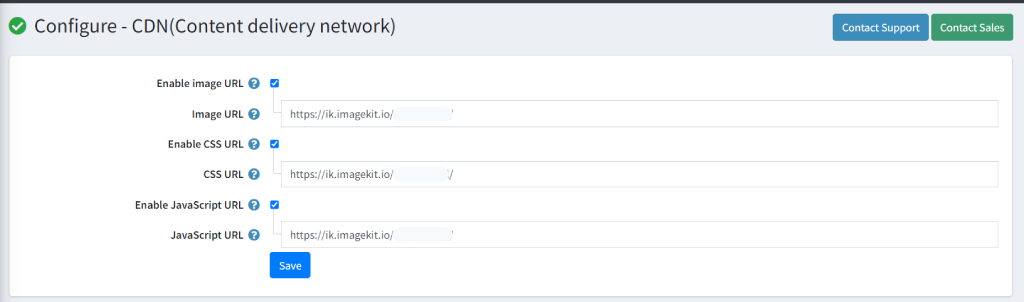
- Click on the Save button.
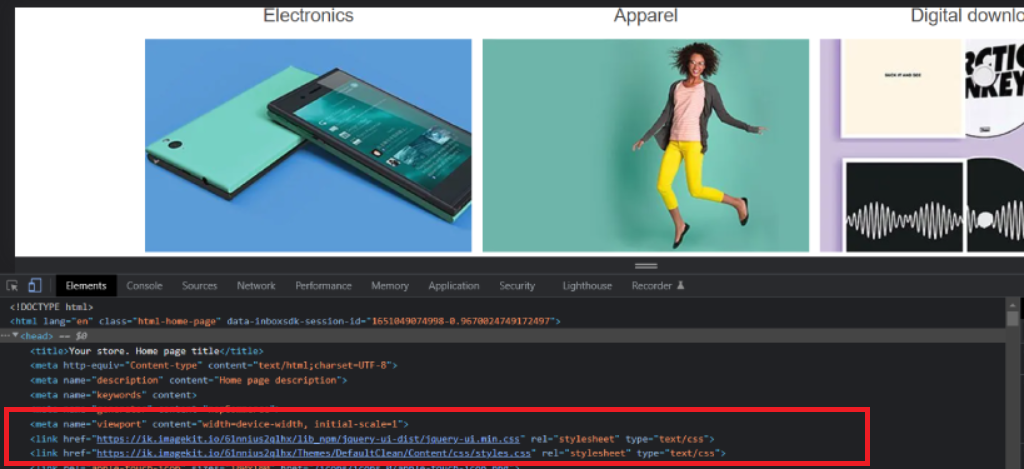
- You can now go to the public store and press right-click and click on inspect to confirm whether the Images, CSS, and JavaScript are coming from the Imagekit.io or not as shown in the image below.