Add a new popup list
Once you click on the Add New button, it will display the Add a new hello bar as shown in the image below.
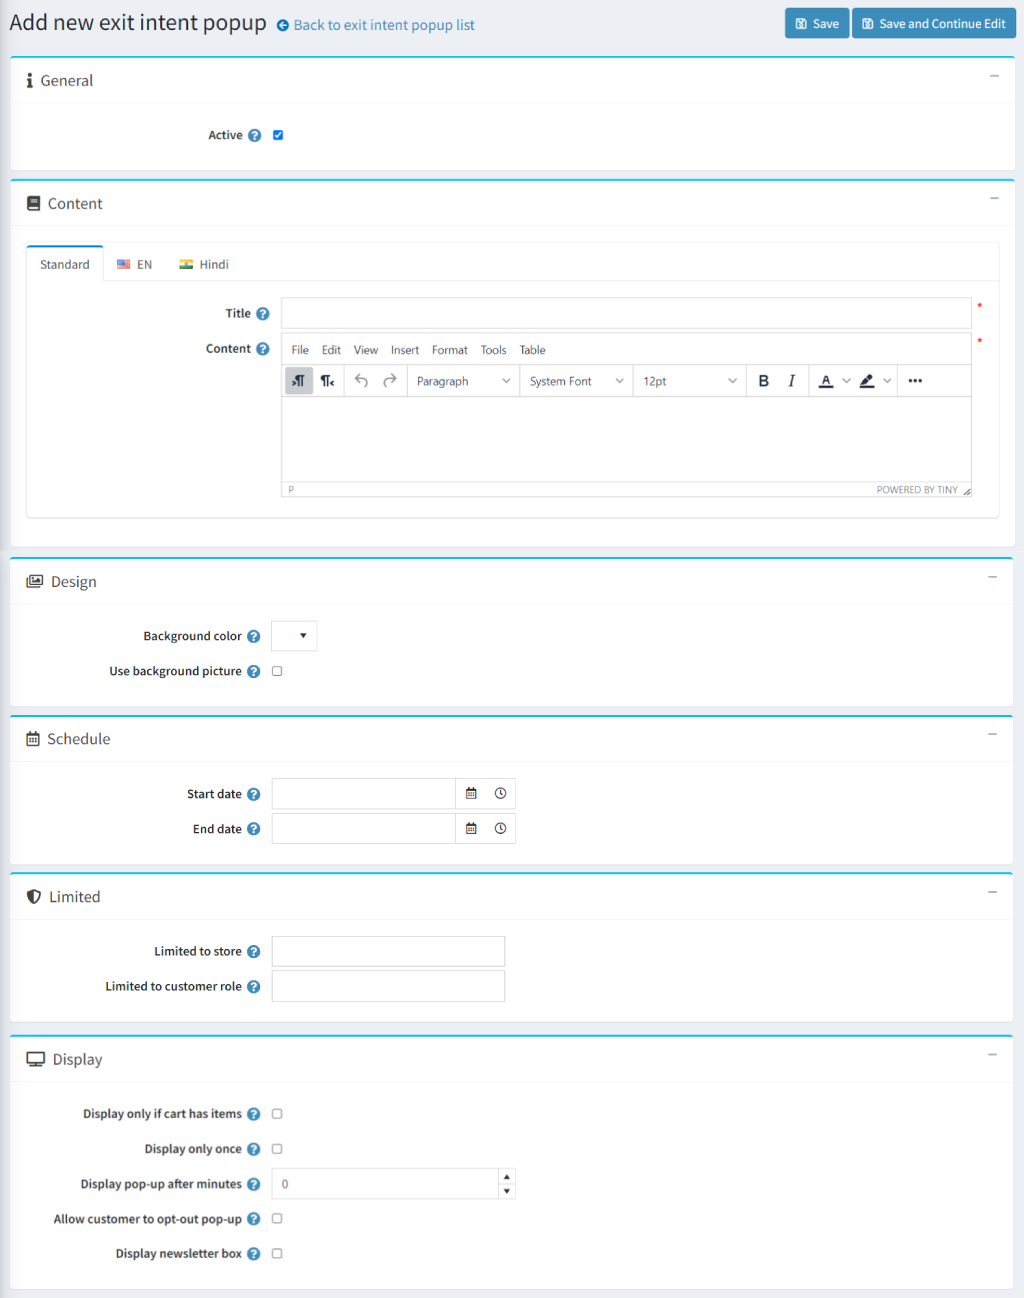
The settings on add a new hello bar is explained below:
- General
- Active: Checkbox to active and inactive popup.
- Content
- Title: Add a title name for the popup. This title will be displayed as a heading for the popup.
- Content: Add message for the Popup. You can also add clickable links in the description of the popup.
- Design
- Background color: Set background color for the Pop-up. This would help you to highlight your content.
- Use background: Check this setting if you want to add a background image to the popup.
- Use background picture: Upload a background image here.
- Schedule
- Start Date: Select the start date and time to publish the popup on your nopCommerce store.
- End Date: Select the end date and time to end the popup on your nopCommerce store.
- Limited
- Limited to store: Select any store for which you wish not to display a Popup.
- Limited to customer role: Select a customer role for whom you wish to display a popup.
- Display
- Display only if cart has items: Check this option for displaying the popup when a customer has abandoned cart.
- Display only once: Check this option for displaying the popup only once.
- Display pop-up after minutes: If the above option is uncheck, then the store owner can set a timer for displaying pop-up at certain intervals of time.
- Allow customers to opt-out pop-up: Check this option to allow customers to opt-out of popup. Once the customer opt-out, they won't see the popup again.
- Display newsletter box: Check to display newsletter subscription box on the popup.
- In the end, don’t forget to Save all your settings.